Sunday, January 5, 2014

Makeup Brush Guide- Other Tools and Brush Maintenance


Hey Glams and Geeks! Today is the third and final part of my Makeup Brush Guide Series. So far, we have talked about face brushes to help you prime, prep, and enhance your face. Then, we looked at brushes that help to create your desired eye looks from a neutral eye to a smokey eye. Now, we will be discussing a few more tools that are essential to helping you achieve your best face yet. Let’s begin!
 Brush: Lip Brush

Purpose: The purpose of the lip brush is to apply lip products (lipstick, lip gloss, lip balm, etc.) to your lips without needing to use your fingers.

Tips: A lip brush is a great tool to have on hand for a few reasons. If you have reached the end of your lip stick, but there is still a bit more product left in the base of the tube, use a lip brush to gather the remaining product and apply it to your lips, or if there’s enough, transfer the excess into a plastic container. Another great use is to achieve clean, crisp lines when working with some brighter or darker colors, line your lips with a lip liner, and apply your desired lipstick color to your lips, using your lip brush.

Recommendation: Eco Tools Detailed Lip Brush, $3.99, can be purchased online at EcoTools.com or in stores at your local Walmart, Target, or participating Eco Tools retailer.


Brush: Shield Brush

Purpose: The shield brush is meant to protect your face makeup from shadow fallout or mascara smudges. Simply hold it under your eye during your eye shadow or mascara application to prevent any mistakes.

Tips: Before using the shield, try applying a generous amount of setting powder beneath your eyes and let it sit. Apply your shadow or mascara, then remove your shield. Now blend out your setting powder to finish your look!

Recommendation: E.L.F Cosmetics Studio Mascara and Shadow Shield, $3, can be purchased online at Eyeslipsface.com or in stores at your local Target location.


Tool: Lash Curler

Purpose: This one is also pretty self-explanatory, but is such an important step prior to applying your mascara to achieve lengthy, curled lashes!

Tips: To get a curl that lasts all day, heat up your lash curler by holding it before a blow dryer for no longer than 5 to 10 seconds. This will have the same effect that a curling iron would on your hair, creating a long lasting curl. After, coat your lashes with 1 or 2 strokes of mascara to complete your look.

Recommendation: Revlon Extra Curl Eyelash Curler, $6, can be purchased in stores at your participating Revlon retailer. Details of this tool can be reviewed at Revlon.com


 Tool: Tweezers

Purpose: Tweezers are an essential beauty tool as you can use these to clean up any sparse hairs on your brows, between your regular brow grooming appointments.

Tips: Tweezers are a great tool for applying lashes! Whether applying strip or single lashes, simply grab your lashes by the tips of the hairs and apply a layer of lash glue. Let this sit for 20 to 30 seconds, and begin applying your lashes at the center. Make sure its settled just above your lash-line and that its secured in place, then proceed in applying it to the inner and outer corners.

Recommendation: E.L.F Cosmetics Gem Tweezer with Pouch, $4, can be purchased online at Eyeslipsface.com or at your local Target location.

Tool: Spray Bottle

Purpose: The spray bottle is meant to be filled with water, and used for various beauty techniques, such as to wet your shadow brush prior to applying metallic/shimmery shadows or pigments or to mist your beauty blender prior to blending out for makeup.

Tips: Fill your bottle 2/3 with water, and 1/3 with Rose Water for a gentle rose aroma every time you mist your brushes/sponges. Also, Rose Water is great for the skin so you have the added benefit of applying antioxidants to your skin while you apply your makeup!

Recommendation: Spray bottles can be purchased at your local Walmart, Target, CVS, Walgreens, etc. and can be found in the travel section. Bottles should not cost more than $2.

Tool: Towelettes

Purpose: These are good to have on hand to wipe off any excess makeup from your hands or brushes, and are great to quickly clean brushes before applying your makeup.

Tips: Keep these towels close by, by storing them near your designated makeup area. That way, you’ll always have them near you when you need them most! To clean your brushes with these, mist your brushes with your brush cleansing spray and gently wipe your brush back and forth to remove the makeup, then dry it on a separate towel.

Recommendation: Equate w/ Chamomile, Vitamin E, and Triple Tea Complex Cleansing Towelettes, $3.97, can be purchased online at Walmart.com or in stores at your local Walmart location.


 Tool: Brush Cleansing Spray

Purpose: Brush cleansing spray is great to help maintain your brushes clean between washes.

Tip: If you like DIY projects, here is an opportunity to make your own brush cleansing spray! Using a spray bottle to hold your cleanser, mix 2 cups of distilled (or filtered) water, ½ cup of Isopropyl Alcohol (with a high alcohol content to sanitize brushes!), 2 tbs of Dish Soap (or baby shampoo for a gentler formula), 2 tbs of Leave-In conditioner, and this last one is optional, either 2 tbs of Rose Water or your choice of scented essential oil to make it smell lovely!

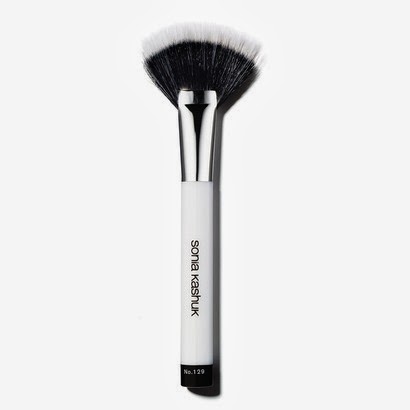
Recommendation: Sonia Kashuk Brush and Sponge Cleanser, $6.99, can be purchased online at Target.com or at your local Target location.

 Tool: Brush Shampoo

Purpose: Brush shampoo is extremely necessary in the maintenance of your brushes. Shampooing extends the durability of brushes, as well as prevents breakouts, so be sure to have some on hand!

Tip: If you want to save some money or prefer a gentle cleanser for your brushes, go for baby shampoo. It will leave brushes super soft and clean. If you have sensitive skin, go for Antibacterial soap. It will deep clean your brushes and remove any bacteria that could be buried between the bristles.

How-To: For anyone who may wonder how you should shampoo your brushes, here’s a quick step-by-step explanation.

You will need a sink, your brush shampoo, a towel, and a space to leave your brushes out to dry overnight.

Start by running your brushes under lukewarm water. Place a quarter-sized amount of shampoo into your palm and begin to swirl your brush into the shampoo. Once you’ve built up a good lather, use your fingers to scrub between the bristles as you would your own hair. Rinse, and repeat to really get all of the product out from your brush. After, gently dry your brush with towel, and lay it out to dry. Do not place your brushes to dry upwards in your brush holder as water can seep into the bristles and prevent the brush from drying or can make your brushes shed, or even worse, come apart at the base. So always make sure to lay them out to dry overnight.

Recommendation: E.L.F Cosmetics Studio Brush Shampoo, $3, can be purchased online at Eyeslipsface.com or in stores at your local Target location.

Thanks for reading my Makeup Brush Guide series! I hope this was able to provide some knowledge on the essential makeup brushes, their intended purpose, some tips to help you use them to their full potential, as well as which brushes offer amazing quality for affordable prices. Be sure to follow me on Instagram to stay up to date on upcoming posts, for quick product reviews, swatches, and beauty tips, and much more. @TheGlamGeekConfessional


Saturday, January 4, 2014

Makeup Brush Guide- Eye Brushes


Hello Glams and Geeks! I hope yesterday’s post was very helpful in giving you a good enough description of each brush and their purpose as well as providing some useful tips and affordable brush options. Today’s post will be much like yesterdays, only that today we will be talking about eye brushes. Since the eyes are the focus of the face, it is very important to use tools that will allow you to pat, blend, and shade your eyes in a way that will make them sparkle a little brighter and be noticed in a way like never before. So, without further ado, let us begin!


Brush: Lid Brush

Purpose: A lid brush, which can go by other terms such as an eye shadow brush or a shader brush, is intended for applying shadow directly to the eyelid. This brush contains densely packed bristles, which allows for more product to be picked up on the brush and applied to the lid.

Tip: When working with shimmery/metallic shades, mist your brush with water, and pat the color onto your lid to pack it on. This will guarantee the best color payoff for your shimmering shades and will make them sparkle and shine brilliantly. I suggest not to use swiping motions (left to right swishes) when applying eye shadow, as this actually swipes away the shadow rather than allows it to be placed on the lid, making for a dull, faded color that barely lasts on the lid and seems poorly done.

Recommendation: Real Techniques Shading Brush, $6, can be purchased online at RealTechniques.com or in stores at your nearest Ulta location.


Brush: Crease Brush

Purpose: The crease brush is intended to help you directly apply color to the creased section of your eyes. The purpose of this is to compliment the lid color, as well as define the shape of your eyes.

Tip: Be sure when using a crease brush to lightly pat your brush onto the surface of your shadow, then, before applying it, tap your brush on the edge of the shadow casing to get rid of any excess product. By doing this, you will be able to keep your crease clean and can build up to your desired color. Too much product applied to the crease makes for a messy application and a harsh color.

Recommendation: E.L.F Cosmetics Essential Eye Crease Brush, $1, can be purchased online at Eyeslipsface.com or in stores at your local Target location.


Brush: Blending Brush

Purpose: The blending brush is meant to blend the lid and crease colors together, making them seem as if they are transitioning smoothly along the space of your lid.

Tip: Always go for a neutral color that compliments and balances both the lid and crease colors. Try selecting a color that seems most like the natural color of your crease when your skin is bare and free of any makeup.  

Recommendation: Sonia Kashuk Pointed Blending Brush #109, $3.99, can be purchased online at Target.com or in stores at your local Target location.


Brush: Smudge Brush

Purpose: A smudge brush is great to have on hand as it can be useful in creating any look. You can use it to apply shadow along the upper and lower lash lines, the inner corners, and in the crease. Its pointed tip makes it easy to get into hard-to-reach spots and transform your makeup.

Tip: To achieve a quick and easy smokey-eyed effect, try using whatever color you applied to your crease and apply it to your lower lash line with your smudge brush. Just go along the shape of your eye, and bring it up to the corner, and into your crease, and blend it in evenly. This will give you a sultry look in 2 minutes or less!

Recommendation: Eco Tools Sharpen and Smudge Duo, $3.99, can be purchased online at EcoTools.com or in stores at your local Walmart, Target, or participating Eco Tools retailer.


Brush: Eye Liner brush

Purpose: This brush is pretty self-explanatory, but to put it simply, it is a brush, either pointed or angled, that is meant to line the shape of your eye.

Tip: Since applying eye liner can be such a pain, I recommend starting at the edge of your eye with the wing. Create the slant extending outwards, without bringing it too high up. Then, go to the inner corner of your eye, and keep the brush right on the lash line, connecting it to the end of the wing. Now that you have this line created, go to the top of the wing, and start to bring it inwards towards the inner corner of your eye. Now, fill in the space, and voila! You have mastered the winged-linger!

Recommendation: E.L.F Cosmetics Studio Small Angled Brush, $3, can be purchased online at Eyeslipsface.com or in stores at your local Target location.


Brush: Brow Grooming Brush

Purpose: The brow grooming brush is meant to tame your brows and prepare them to be shaped or filled in. I recommend finding one that contains an angled brush on the end as this can be your go-to tools to prep and dress your brows with!

*Note: Can't find a double-sided brush? No problem! You can always use your angled eye liner brush to shape your brows as well! This is part of the "Knowing your tools" thing I mentioned in yesterday's post and now you see how being familiar with each brush can come in handy!

Tip: To create a great shape when filling in your brows, first start by dipping the brush end into your preference of brow powder, gel, liner, etc. Begin tracing along the bottom part of your brow, all the way from the base of your brow, to the tail. Next, fill in the tail, and use the excess product to trace along the top part of your brow. Now, you want to lightly apply product from bottom to top on the front part of your brow to fill it in without making it look too obvious. Lastly, use your spooley or comb to brush through your brows, and make them look a bit more natural.

Recommendation: Ardell Duo Brow Brush, $4.49, can be purchased online at SallyBeauty.com or at your nearest Sally Beauty location.


As always readers, thank you for reading this post! I hope you enjoyed reading this whether you are a beginning beauty, a curious artist, or just in the market for some great affordable brushes! Check back tomorrow, same time and place for the third and final part of this review focusing on Other Beauty Tools and Brush Maintenance! Also, if you have not done so already, be sure to follow me on Instagram to keep up with upcoming blog announcements, quick product reviews and raves, look of the day, beauty tips and inspiration, and much more! Follow me @TheGlamGeekConfessional

Friday, January 3, 2014

Makeup Brush Guide- Face Brushes


Hello Glams and Geeks!  Today’s post was requested by one of the readers, and I thought it was a great idea to do this, as it can be beneficial for anyone who is a beginner or just wants to know what each brush is intended for. This post will be focusing strictly on brushes that will assist you in achieving your everyday makeup looks, which will result in a flawless finish. When it comes to makeup and brushes, it is good to think of things in this way: Your face is your “canvas”, and the makeup looks you create upon it is your “art”, and just like art, it is necessary to have the proper tools and equipment to create your artwork. When it comes to makeup application, it is essential to make sure that you are using the right tools to create your desired look. There will be times when you won’t have to necessarily use a specific brush for a specific type of application, but in that event, it will be helpful to know how certain brushes work first in order to determine whether or not it will help you achieve your desired look. I would also like to state that any and all brushes recommended in this post is strictly for the purpose of providing an example of a particular brush, and to help you find great brushes that work well and are available at affordable prices, ranging at $20 or less. I suggest that anyone purchasing brushes should do the necessary research, and purchase a brush of their absolute liking. So, let’s start with the basics and talk a bit about face brushes and about what each one does during your base application.


Left: Real Techniques Powder Brush
Right: Sonia Kashuk Dense Powder/Blush Brush


Brush: Powder Brush

Purpose: A powder brush is the most basic brush as it is intended simply for powder products. This brush is great to apply any form of powder products, from pressed to loose powder foundation, translucent or setting powder, or any other powder product you may wish to apply.

Tips: I recommend to identify your preference in coverage. For example, if you prefer sheer coverage with your foundation, I suggest to use a large fluffy powder brush, containing open, loosely packed bristles, allowing you to pick up a light amount of powder to apply. If you prefer medium to full coverage, go for a brush that contains dense, tightly packed bristles. This will allow you to apply more product to your face, and achieve your desired coverage.

Recommendation for Sheer Coverage: Real Techniques Powder brush, $10, can be purchased online at RealTechniques.com or in stores at your nearest Ulta location.

Recommendation for Medium/Full Coverage: Sonia Kashuk Dense Powder/Blush Brush No 24, $17.99, can be purchased online at Target.com and in stores at your nearest Target location.


Brush: Foundation Brush

Purpose: This brush is intended for the use of applying cream or liquid foundation. Its purpose is to help you apply even layers of your foundation to your face, creating a smooth, flawless application.
Tips: I recommend when purchasing this brush, to select one with an angle as angled brushes allow you to reach curves and corners such as along the sides of your nose, along your jaw, and down the bridge of your nose.

Recommendation: E.L.F Cosmetics Studio Angled Foundation Brush, $3, can be purchased online at Eyeslipsface.com or in stores at your local Target location.


Left: Revlon Premium Quality Concealer Brush
Right: Eco Tools Airbrush Concealer Brush 


Brush: Concealer Brush

Purpose: A concealer brush is intended to apply cream or liquid concealer under the eyes or to any trouble spots that you’d like to hide. It allows you to control how much product you apply and where. Some concealer brushes are flat, with a rounded tip, intended just for applying and smoothing the product along the skin. There are also multipurpose brushes, which feature a fuller tip, which is intended for both applying and buffing the product into the skin.

Tips: Prior to applying your concealer, try using an eye shadow primer under your eyes. The same way shadow primer holds your shadow in place all day without creasing, this too applies in the case of your concealer when used.

Recommendation for Flat Concealing Brush: Revlon’s Premium Quality Concealer Brush, $6, details of the brush can be reviewed online at Revlon.com and can be purchased at Walgreens, CVS, or participating Revlon retailer.

Recommendation for Buffing Concealer Brush: Eco Tools Airbrush Concealer Brush, $4, can be purchased online at EcoTools.com or in stores at your local Walmart, Target, or participating Eco Tools retailer.


Brush: Buffing Brush

Purpose: A buffing brush is intended to be used with cream and liquid products, such as foundations and blushes. It is meant to buff out the product and blend it evenly upon your face or cheeks, smoothing out any uneven lines or textures and creating a smooth finish.

Tips: When using this brush for cream blush products, work the blush onto the apples of your cheeks in a circular motion for a nice, natural, healthy color.

Recommendation: Eco Tools Custom Coverage Buffing Brush, $7, can be purchased online at EcoTools.com or in stores at your local Walmart, Target, or participating Eco Tools retailer.


Left: Eco Tools Sheer Finish Kabuki Brush
Right: Real Techniques 2-in-1 Kabuki Brush


Brush: Kabuki Brush

Purpose: A kabuki brush is intended for the purpose of applying various powder products such as foundation, bronzer, and blush in compressed and loose forms. It is meant to create a flawless appearance, and is perfect for buffing, smoothing, and evening out products that you are applying. It is also great for giving subtle color to your cheeks when applying blush, to softly contour your face when working with a bronzer, and to create an airbrushed look when used with foundation.          

Tips: When buying a kabuki brush, opt for one with super soft synthetic fibers for the best results. Also, always make sure to tap off any excess powder before applying your product as with kabuki brushes, less is more.
Recommendation for Sheer Coverage: Eco Tools Sheer Finish Kabuki Brush, $7, can be purchased online at EcoTools.com or in stores at your local Walmart, Target, or participating Eco Tools retailer.

Recommendation for Medium to Full Coverage: Real Techniques 2-in-1 Kabuki Brush, $10, can be purchased online at RealTechniques.com or in stores at your nearest Ulta location.

*Note: This brush is super convenient as it doubles as both your basic kabuki brush, and opens up into a contour brush making it easy to contour your face as well as apply blush or any other cosmetic purpose you may have.*


Brush: Setting Brush

Purpose: The setting brush is intended to set your makeup in place, such as when using cream or liquid products, and helps keep your foundation or concealer from smudging, creasing, or fading throughout the day.

Tips: When setting makeup, follow up with a good setting spray to really seal in your look.

Recommendation: Real Techniques Setting Brush, $8, can be purchased online at RealTechniques.com or in stores at your nearest Ulta location.


Brush: Beauty blending sponge

Purpose: The purpose of the blending sponge is to blend out any cream or liquid products such as foundation, blush, illuminators, concealers, or any other cream or liquid product that you wish to blend. It creates a super dewy, glowy look and is perfect for anyone who wishes to achieve natural barely-there makeup. The beauty blending sponge is meant to be used wet to create a gorgeous dewy finish.

Tips: When caring for your beauty blender, be sure to wash it very gently as these sponges are very delicate and may tear easily. Also, when wetting your sponge, try misting it with rose water to give your complexion some nourishment while you apply your makeup. It helps to soothe any irritation, provides a boost of antioxidants to the skin, and acts as a refreshing toner to the skin. Also, it smells lovely!

Recommendation: Soho Beauty Sponge, $4.97, can be purchased online at Walmart.com or in stores at your nearest Walmart location.


Brush: Blush Brush

Purpose: The purpose of a blush brush is pretty apparent, to deliver color to the apples of your cheeks! There are different types of blush brushes as there are ones that are best used with powder products, and ones that work best when used to apply cream or liquid blushes. It is best to keep brushes on hand that will allow you to apply either or as you never know when you will need them!

*Note: The difference between using powder and cream blushes is simply the finish of the products. If you prefer nice, silky smooth color, opt for a powder blush. It will give you gorgeous smooth color along your cheeks. If you prefer a somewhat wet look, then go for cream blush. They are very hydrating and give you a gorgeous dewy complexion.

Tips: If you want to know where to apply your blush, start by placing two fingers beside either side of your nose, and start the application next to the outer finger, upon the apples of your cheeks. Also, rather than smiling, try sucking in your cheeks when you apply blush to make your cheeks really stand out!

Recommendation: Sonia Kashuk Blusher Brush No 101, $11, can be purchased online at Target.com or in stores at your nearest Target location.


Brush: Stippling Brush

Purpose: The stippling brush is intended to blend out cream or liquid products such as foundation or blush, creating a super smooth, airbrushed look.  When applying products with this brush, be sure to work in the product in circular motions for the best finish.

Tips: I prefer using my stippling brush to apply cream blush as it creates a gorgeous dewy finish on my cheeks. Also, it is best to select a brush that contains super soft synthetic fibers for the best results!

Recommendation: E.L.F Cosmetics Studio Small Stippling Brush, $3, can be purchased online at Eyeslipsface.com or at your nearest Target location.


 Left: Real Techniques Kabuki Brush- Can be used to contour large sections
Middle: Sonia Kashuk Large Angled Contour Brush- Large Sections
Right: E.L.F Cosmetics Angled Contour Brush- Can be used to contour small sections

Brush: Contour Brush

Purpose: The contour brush is intended to sculpt the face and bring out the bone structure, creating a perfectly defined face, emphasizing ones cheek structure, nose definition, jaw line, and eye definition. Can also be used on collar bones to create a more prominent appearance.

Tips: If you are a beginner and want to avoid errors when contouring, try using a powder bronzer to learn how to contour your face. Once you have emphasized your cheeks, jaw, temples, and nose, go over your face with a light layer of powder to blend everything out.

Recommendation for larger contour parts (cheeks, jaw, forehead/temples): As mentioned earlier, Real Techniques 2-in-1 Kabuki Brush (details above), or Sonia Kashuk Large Angled Contour Brush, $10, can be purchased online at Target.com or in stores at your nearest Target location.


Recommendation for smaller contour (nose): E.L.F. Cosmetics Studio Angled Contour Brush, $3, can be purchased online at Eyeslipsface.com or in stores at your nearest Target location.


Left: Sonia Kashuk Fan Brush- Best used with powder highlighter
Middle: E.L.F Cosmetics Stippling Brush- Best used with liquid highlighter
Right: E.L.F Cosmetics Foundation Brush- Best used with cream highlighter
Brush: Highlighting brush

Purpose: The highlighting brush is intended to add highlighter or illuminator to the parts of the face where light would naturally fall. This process goes in hand with contouring as that emphasizes the “shadowy parts” of your face, and this process focuses on your “light spots”. This applies to the forehead, down the bridge of your nose, above your lip, above the cheek bones, and the chin.

Tips: When applying a highlighter, to give a glowing effect, mist your brush with a spray or two of water before applying the product. Applied wet gives a more radiant glowing effect.

Remember earlier when I said “There will be times when you won’t have to necessarily use a specific brush for a specific type of application”? Well, this is one of those times. With highlighting, you can use a few different brushes depending on the consistency of the highlighter. I will provide brushes for each type.

Recommendation for Powder Highlighter: Sonia Kashuk Duo Fibre Fan Brush #129, $8, can be purchased online at Target.com or at your nearest Target location.


Recommendation for Liquid Highlighter: E.L.F Cosmetics Small Stippling Brush (details above)

Recommendation for Cream Highlighter: E.L.F Cosmetics Angled Foundation Brush (details above)


Brush: Fan Brush

Purpose: The fan brush is a handy tool as it serves multiple purposes. It can be used in the processes of applying blush, highlighter, and bronzer, to give a subtle color to the skin. It can be used to even out any loose powder on the skin. And it can be used as a quick clean up tool, as you can gently swipe away any shadow fall out from under your eyes.

Tips: When applying dark shadow to the eyes, pat on a generous amount of setting powder under your eyes but DO NOT blend it out. Let it sit. Once your done applying your shadow, you may notice some shadow fall out has landed on your excess setting powder. Simply use your fan brush to swipe away this dark fall out and blend the clean setting powder that is left over. This makes for a quick and easy clean up!
Recommendation: Sonia Kashuk Duo Fibre Fan Brush #120 (mentioned above)

As always readers, thank you for reading this post! I hope you enjoyed reading this whether you are a beginning beauty, a curious artist, or just in the market for some great affordable brushes! Check back tomorrow, same time and place for the second part of this review focusing on Eye brushes! Also, if you have not done so already, be sure to follow me on Instagram to keep up with upcoming blog announcements, quick product reviews and raves, look of the day, beauty tips and inspiration, and much more! Follow me @TheGlamGeekConfessional